 Save
Save The smell of baked pita bread always pulls me back to a tiny Mediterranean place I discovered during a rainy Tuesday lunch rush years ago. I watched them stuff pitas behind the counter and thought I could do something similar at home. This spinach artichoke chicken version came together on a night when I needed dinner fast but wanted something that felt like a treat.
My sister tried these during an unexpected visit and immediately asked for the recipe before she even finished her first bite. Now they are her go to meal when she wants something comforting but not heavy.
Ingredients
- Cooked chicken breast: Rotisserie chicken works beautifully here and saves so much time
- Artichoke hearts: Canned versions are totally fine just drain them well so the filling does not get watery
- Fresh spinach: Chop it small so it distributes evenly throughout every bite
- Greek yogurt: Creates that creamy texture without making the filling too heavy
- Light mayonnaise: Balances the tang of the yogurt and helps everything bind together
- Mozzarella cheese: Shredded mozzarella melts into gorgeous stretchy strands
- Parmesan cheese: Adds a salty sharpness that cuts through the creamy elements
- Garlic: Fresh minced garlic gives the filling a proper punch of flavor
- Pita breads: Whole wheat adds nuttiness but regular pitas get extra crispy
Tired of Takeout? 🥡
Get 10 meals you can make faster than delivery arrives. Seriously.
One email. No spam. Unsubscribe anytime.
Instructions
- Get the oven ready:
- Preheat to 375°F and line a baking sheet with parchment paper for easy cleanup
- Mix the filling:
- Combine chicken, artichokes, spinach, yogurt, mayonnaise, cheeses, garlic, onion powder, oregano, red pepper flakes, salt and pepper until everything is evenly distributed
- Prep the pitas:
- Cut each pita in half so you have 8 pockets total
- Stuff generously:
- Spoon the filling into each pita half pressing gently to pack it in without tearing the bread
- Bake until golden:
- Arrange stuffed pitas on the prepared baking sheet and bake 15 to 20 minutes until hot throughout and cheese is melted
- Finish and serve:
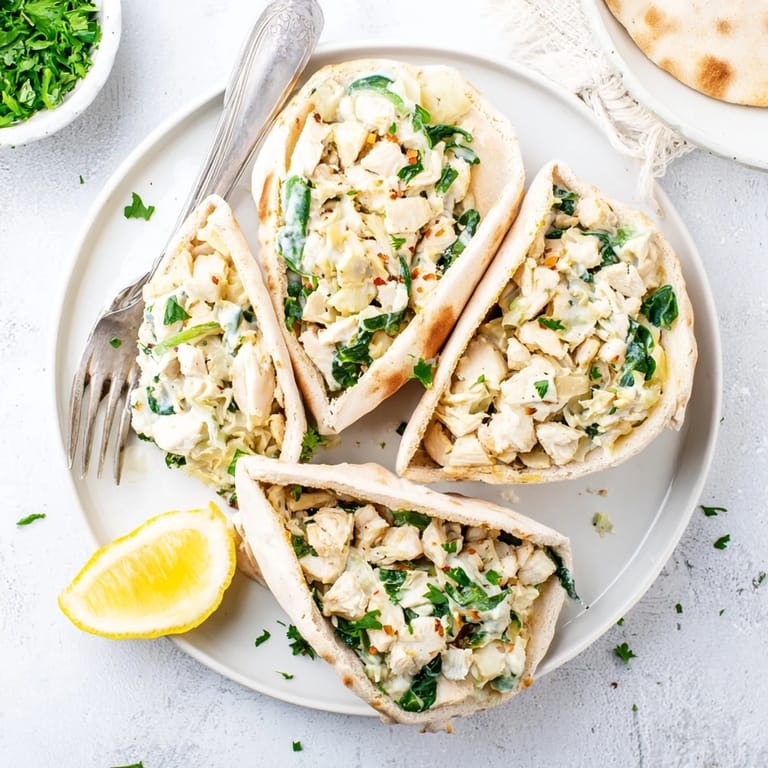
- Garnish with fresh parsley and lemon wedges if you like
 Save
Save These became a Friday tradition at our house because they feel special enough to celebrate the end of a busy week but take barely any effort to put together.
Making Ahead
You can mix the filling a day ahead and store it in the refrigerator. The flavors actually get better as they sit together. Just stuff and bake when you are ready to eat.
Customizing the Filling
Sometimes I add sun dried tomatoes for extra brightness or swap in cream cheese if I want something richer. The recipe is forgiving and welcomes your personal touches.
Serving Suggestions
A crisp green salad with a simple vinaigrette balances the creamy filling perfectly. I also love serving these with roasted vegetables or a light soup depending on the season.
- Warm the pitas slightly before stuffing if they feel stiff
- Extra red pepper flakes add nice heat if you like things spicy
- Leftovers reheat surprisingly well in the toaster oven
 Save
Save Hope these bring as much joy to your table as they have to mine.
Recipe Questions & Answers
- → Can I make these stuffed pitas ahead of time?
Yes, you can prepare the filling up to 24 hours in advance and store it in the refrigerator. Stuff the pitas just before baking to prevent them from becoming soggy. If baking later, cover the baking sheet with foil and bake when ready.
- → What's the best way to reheat leftovers?
Reheat in a 350°F oven for 10-15 minutes until warmed through. Avoid microwaving as the pita can become chewy and the filling may heat unevenly. For best results, wrap in foil while reheating to keep the pita soft.
- → Can I freeze these stuffed pitas?
Yes, freeze unbaked stuffed pitas on a baking sheet until firm, then transfer to a freezer bag for up to 3 months. Bake from frozen at 375°F for 25-30 minutes. No need to thaw first.
- → What can I substitute for the chicken?
For a vegetarian version, substitute with chickpeas, white beans, or extra artichokes. You could also use crumbled feta or goat cheese for additional protein and Mediterranean flavor. Adjust seasonings to taste.
- → How do I prevent the pitas from tearing when stuffing?
Warm the pitas slightly in the microwave for 15-20 seconds to make them more pliable. Gently open the pocket with your fingers rather than a knife. Fill generously but don't overstuff to avoid splitting the bread.